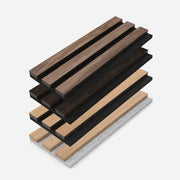
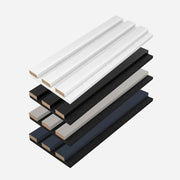
Discover our selection of tambour wall panels, designed to easily transform your space. Perfectly suited for both commercial and residential environments, our tambour wall panels are the epitome of style and sophistication. Explore our range and bring the timeless charm of tambour design into your space. Whether you're renovating or starting from scratch, our tambour wall panels are a perfect choice, offering an unparalleled blend of design and durability. Turn your vision into reality with our tambour wall panels today.
Most popular products
-

Slatpanel® Luxury Smoked Oak Acoustic Slat Wood Wall Panels
From
$314.99$144.99 -

Slatpanel® Black Colour Acoustic Slat Wall Panels
From $144.99
Browse Wall Panelling
Most popular in wall panelling
View All-

Slatpanel® Luxury Smoked Oak Acoustic Slat Wood Wall Panels
From
$314.99$144.99 -

Slatpanel® Black Colour Acoustic Slat Wall Panels
From $144.99
Acoustic Slat Wood Wall Panels
Shop all-

Slatpanel® Luxury Smoked Oak Acoustic Slat Wood Wall Panels
From
$314.99$144.99 -

Slatpanel® Acoustic Slat Wood Wall Panels Sample Box
$29.99$19.99
Acoustic Slat Colour Wall Panels
Shop all-

Slatpanel® Black Colour Acoustic Slat Wall Panels
From $144.99
-

Slatpanel® Acoustic Slat Colour Wall Panels Sample Box
$29.99$19.99
Flutted Wood Effect Tambour Panels
Shop all-

Oak Ridge Fluted Tambour Wood Effect Wall Panels
$299.99$269.99 -

Oak Slat Fluted Tambour Wood Effect Wall Panels
$299.99$269.99 -

Oak ZigZag Fluted Tambour Wood Effect Wall Panels
$299.99$269.99 -

Walnut Ridge Fluted Tambour Wood Effect Wall Panels
$299.99$269.99 -

Walnut Slat Fluted Tambour Wood Effect Wall Panels
$299.99$269.99 -

Walnut Zigzag Fluted Tambour Wood Effect Wall Panels
$299.99$269.99
Get inspired
-
Thousands of combinations in one page.
-
The latest industry news, updates and info.
-
Learn how our customers are making big changes.
-
Learn how our customers are making big changes.
-
News and writings, press releases, and press resources.
-
We’re always looking for talented people.
Browse decoration ideas

Browse decoration ideas
Thousands of combinations in one page
Shipping fees and times
Free delivery to all of Canada
- We endeavour to process all orders within 24 hours following order placement (excluding weekends and holidays). Upon dispatch of your order, you will receive a notification email with tracking details.
Standard delivery times
- Main cities and towns 5 business days
Returns policy
All orders come with a 30 day returns guarantee. We understand that sometimes, a product may not meet your expectations. That's why we offer a simple and straightforward process for returning items to our store. With our easy return policy, you can shop with confidence, knowing that if you're not completely satisfied, we've got you covered. Please start a live chat or give us a call to start your returns process.


